Frequently Asked Questions (FAQ) in Compliance Planet Anti Money Laundering/Core Banking Finance Software.

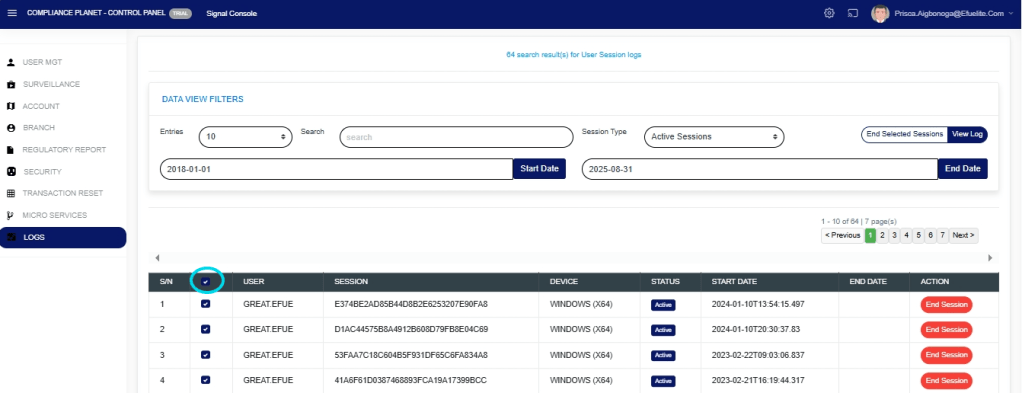
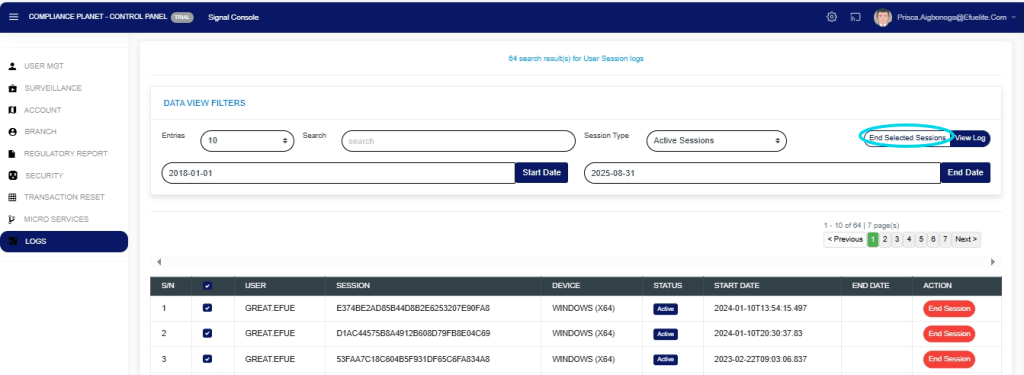
Question 1: Can a user close more than 200 cases at once?

Insight:
You can close more than 200 cases on the app at once. In fact, as many cases as displayed on the screen can be closed at once.

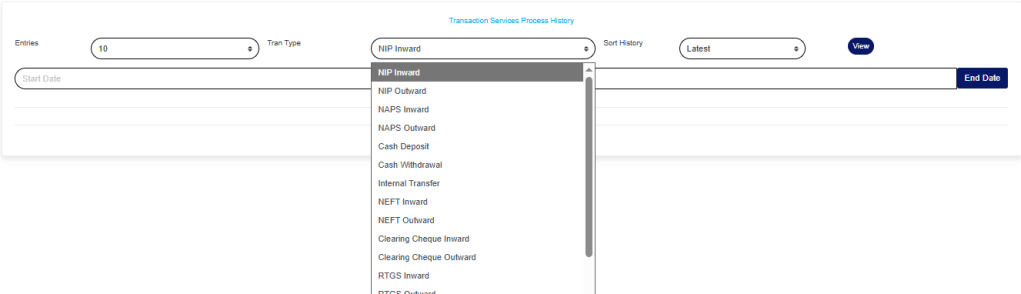
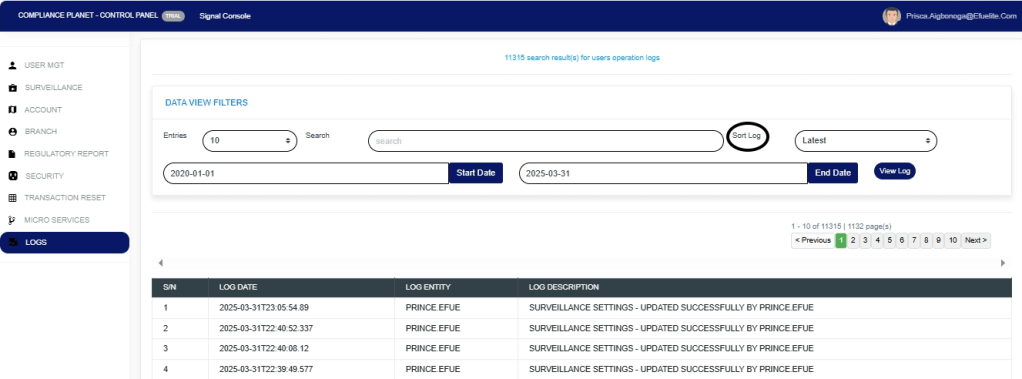
Question 2: Is it possible to sort by amount, date and transaction type on the app?

Insight:
For sorting by any column of your choice, please download to Excel at this time. Currently, you can sort by Transaction Amount and Date. The Pluto AI case filters sort by Account Name.

Question 3: Why does information disappear when entered into the action taken box?

Insight:
There is likely a knowledge gap. This will be demonstrated in a session with our engineer present so they can observe the issue raised first-hand and offer a solution/guidance.

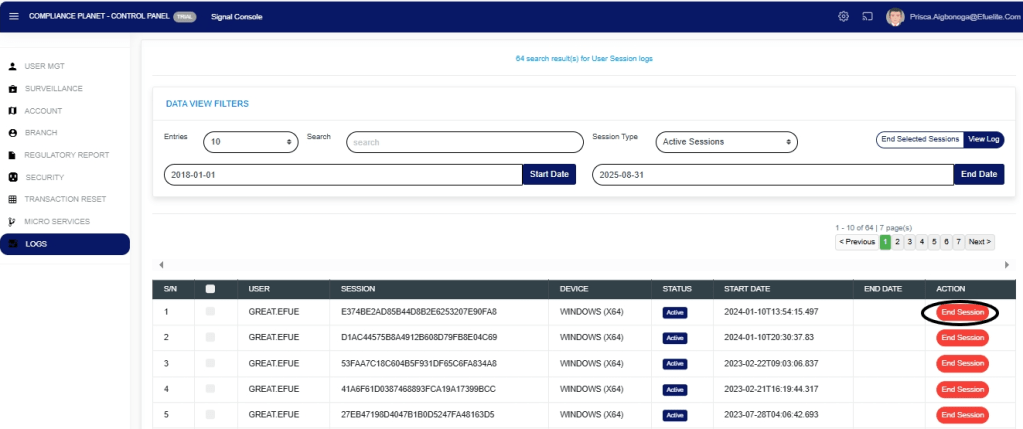
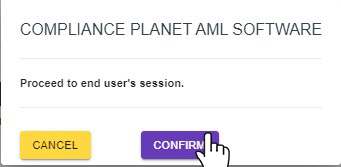
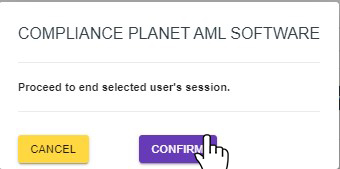
Question 4: Can a user attempt to revert or reopen a closed case?

Insight:
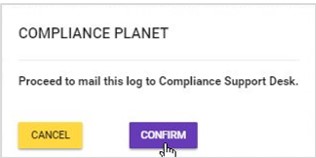
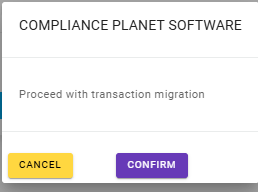
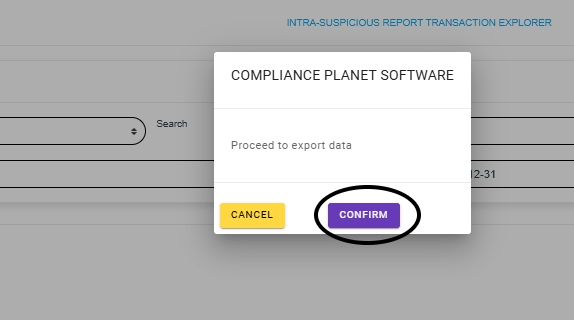
If a case is closed, there is no reversal. It is essential to be certain of the conclusion drawn from an investigation into the system. This is why the system prompts a confirmation before closing an investigation with the user’s selected choice/option.

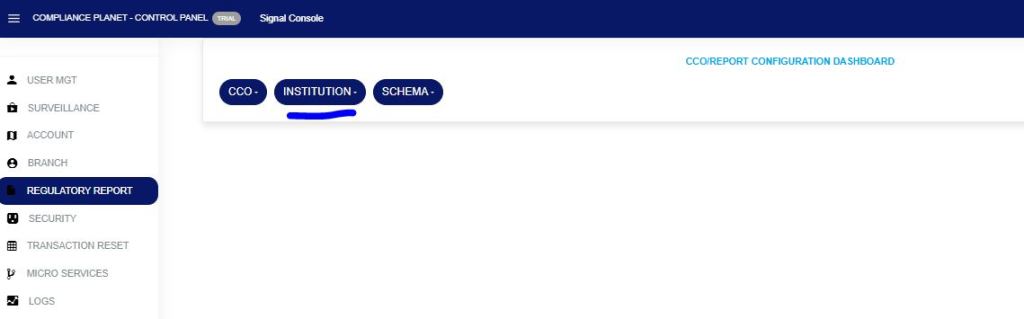
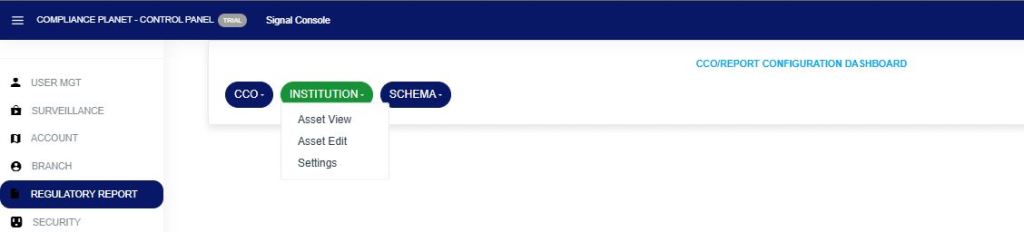
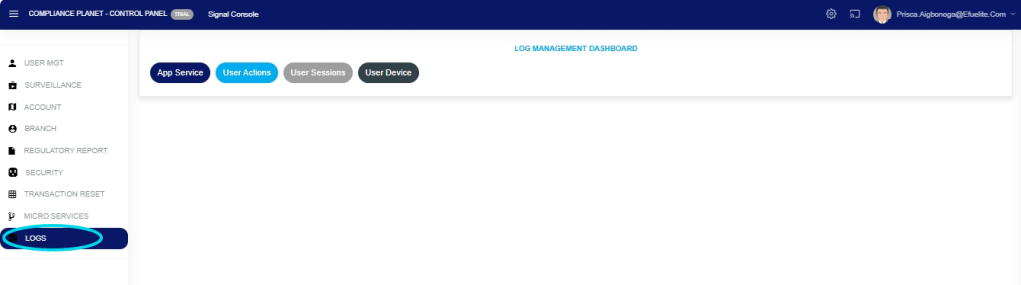
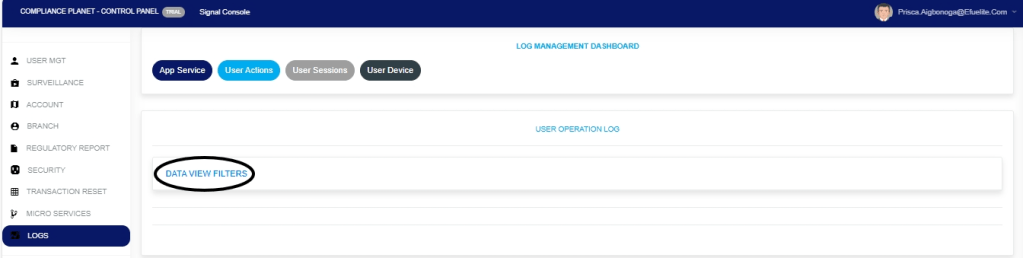
Question 5: Can a user Whitelist an account independently?

Insight:
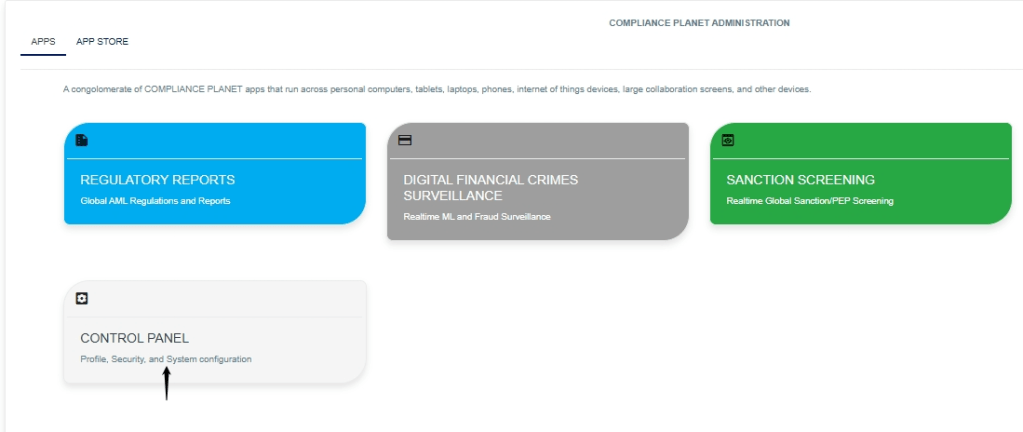
There is a whitelist menu in the control panel app. You will be taken through a walkthrough of how to use it during a session. You can also visit this link for more information on whitelisting an account on Compliance Planet. https://amlreport.com/2025/08/01/how-to-carry-out-whitelisting-operations-on-control-panel-in-compliance-planet-anti-money-laundering-core-banking-finance-software/

Question 6: Why is the time increased for downloading more cases?
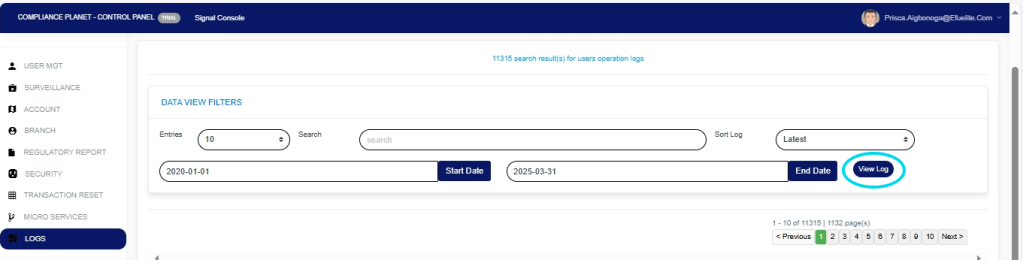
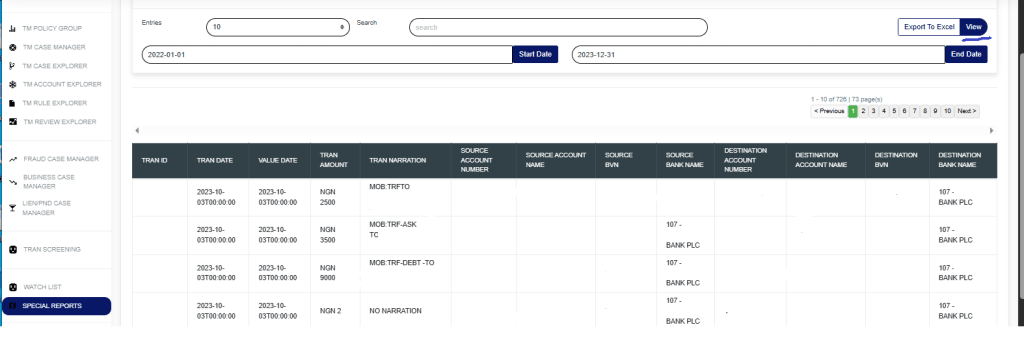
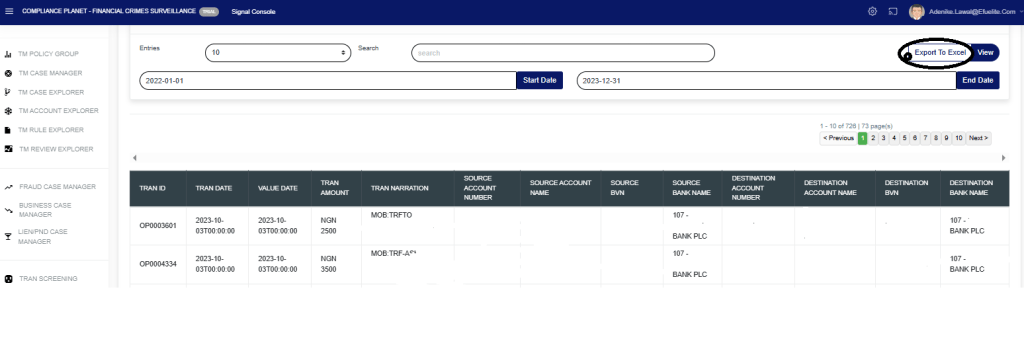
Insight:
Compliance Planet exports all currently displayed information to Excel. The capacity of what can be displayed on the screen is solely determined by the user’s system resources. If the records queried exceed the user’s system’s display capabilities, the user must split the dates; otherwise, the user’s browser will crash, and the page will become unresponsive. The more records you attempt to query, the more server resources are needed to process them. A significant amount of information is gathered for investigation in every case displayed. Therefore, the time taken to process 500 records for display cannot be the same as the time taken to process 5,000 records for display. This is fundamental knowledge applicable to every software.

Question 7: Does the app allow downloading up to 50,000 cases at once?

Insight:
As said earlier, downloads are based on what is displayed. What is displayed is tied to the resources available on the user’s system. We strongly advise getting accustomed to how Compliance Planet works. There are certain limits in place that have enabled the software to scale so easily, despite being on the same resource level since 2017. With the bank’s data tripling in size between then and now.

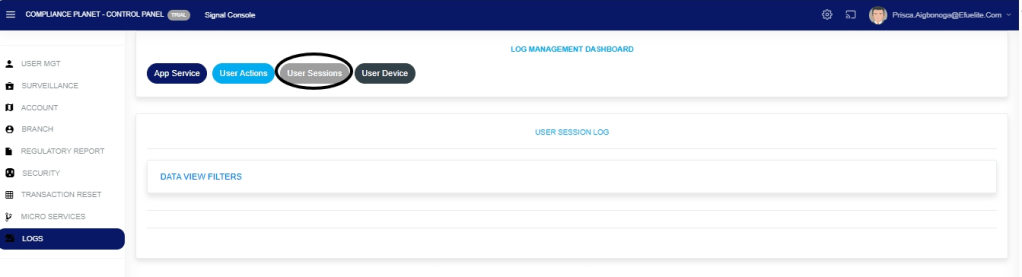
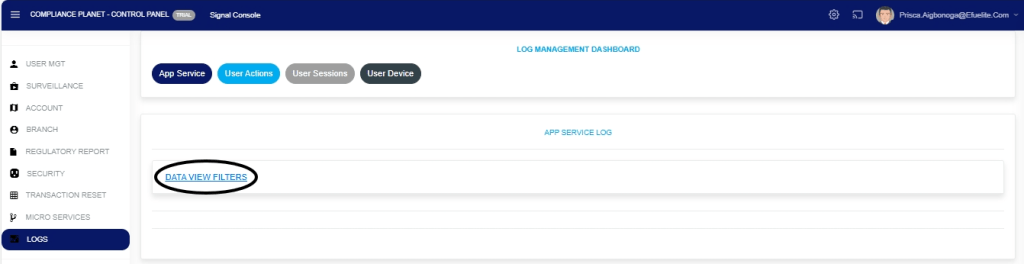
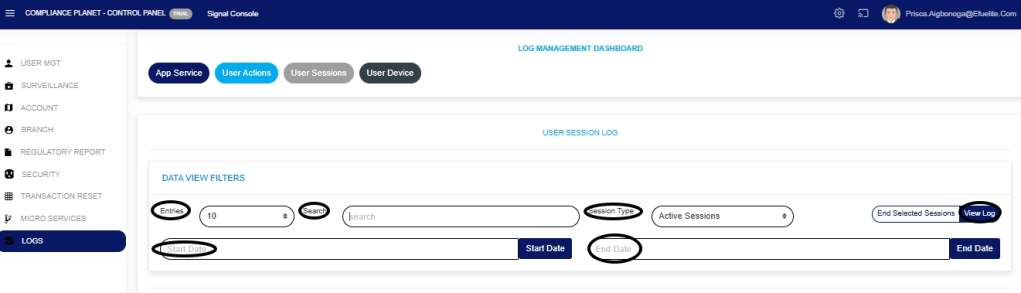
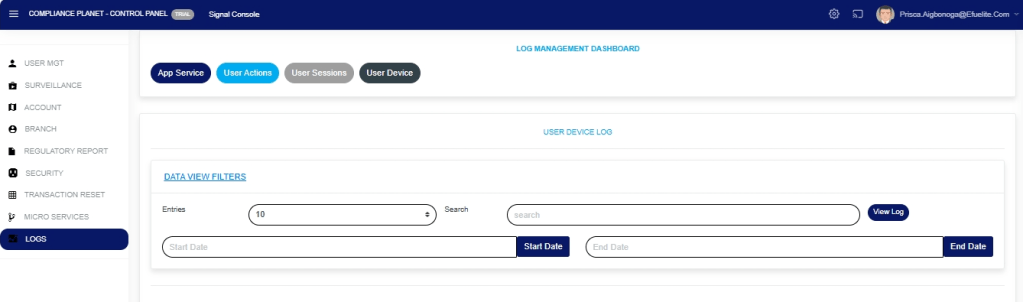
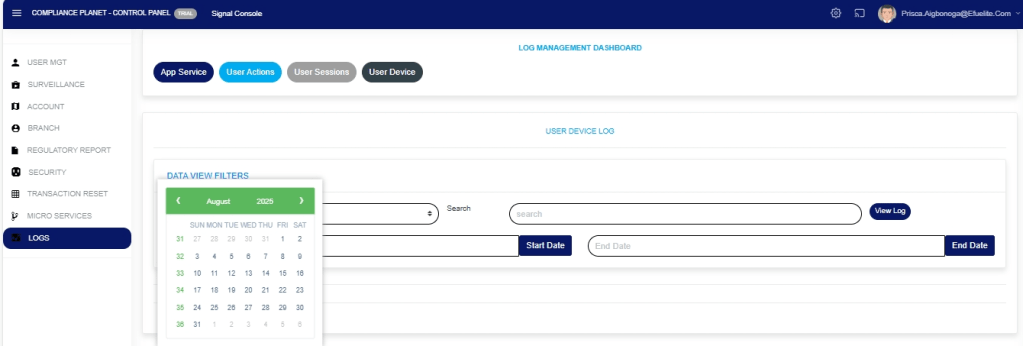
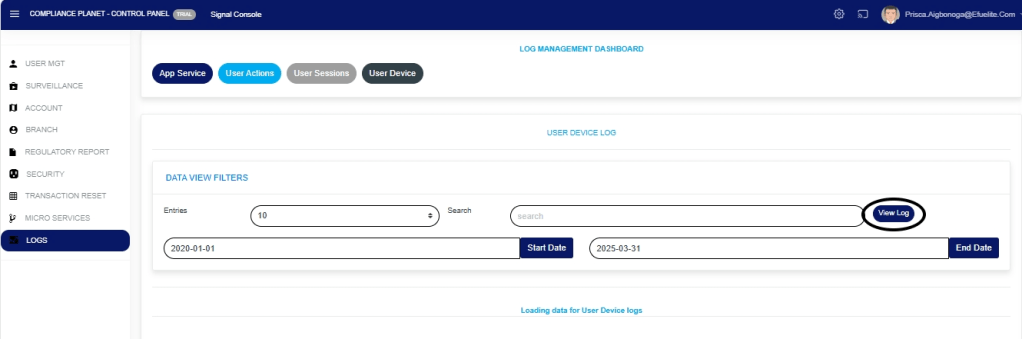
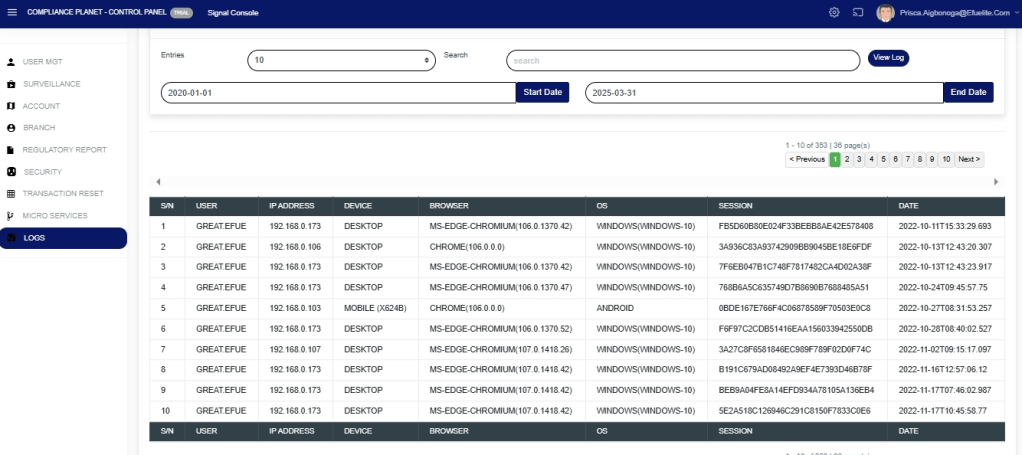
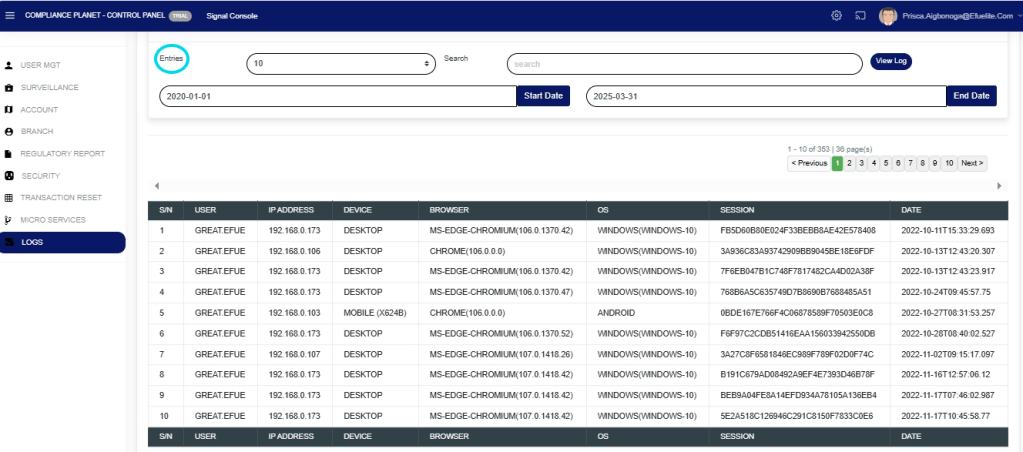
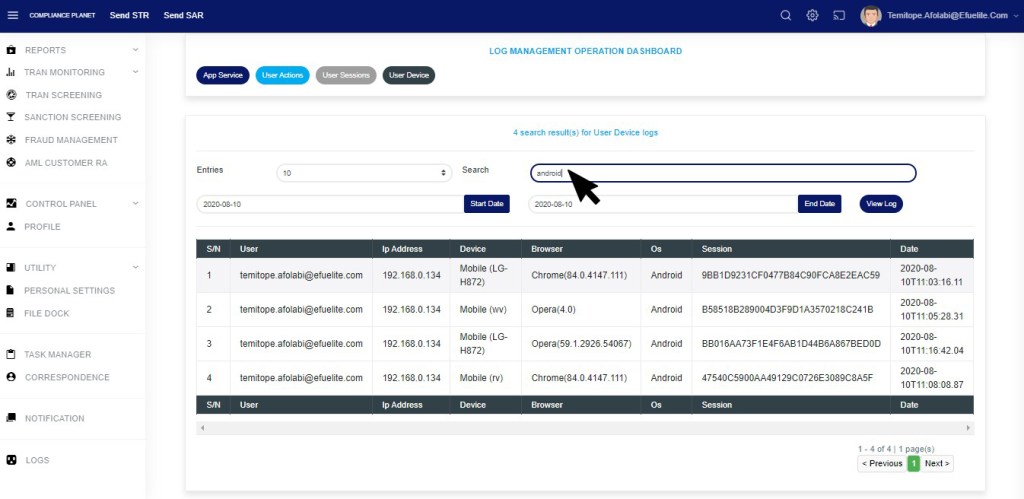
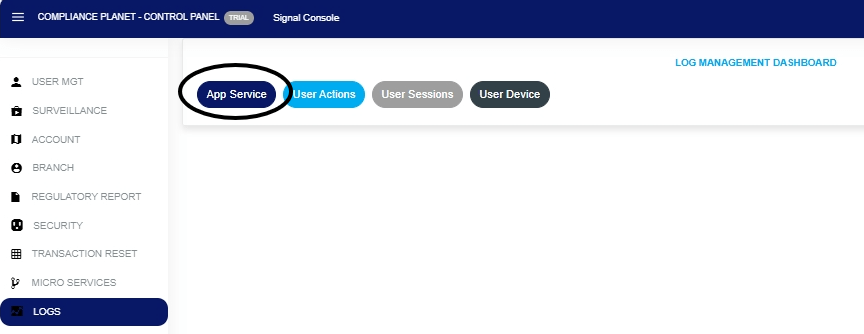
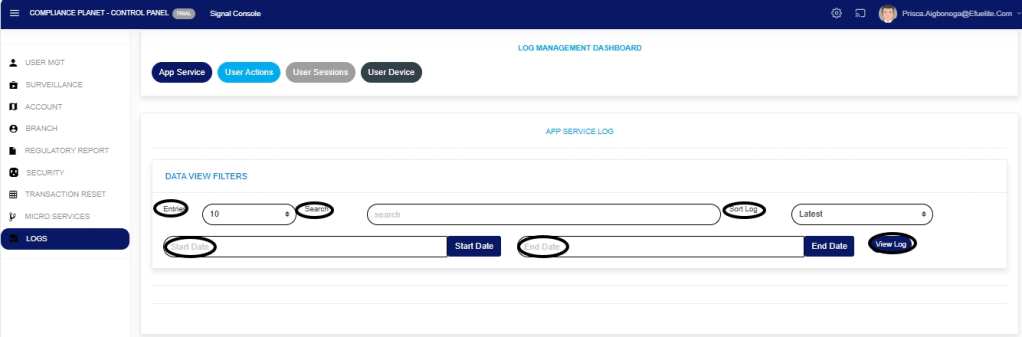
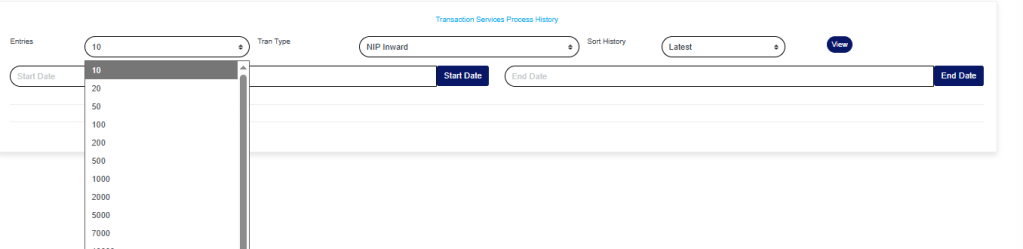
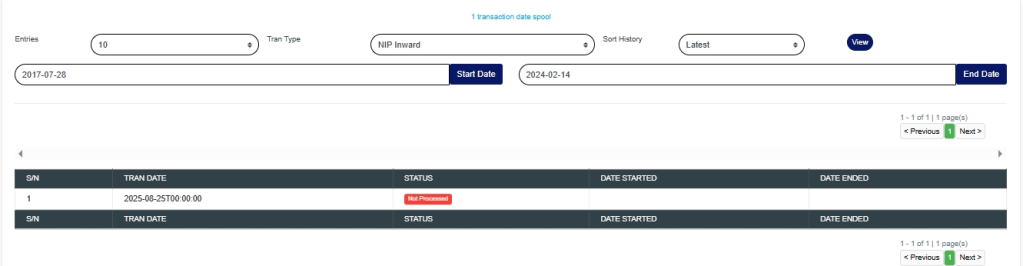
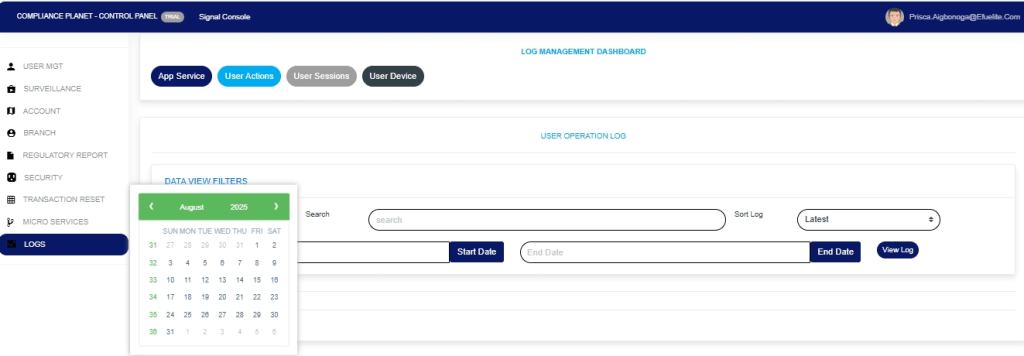
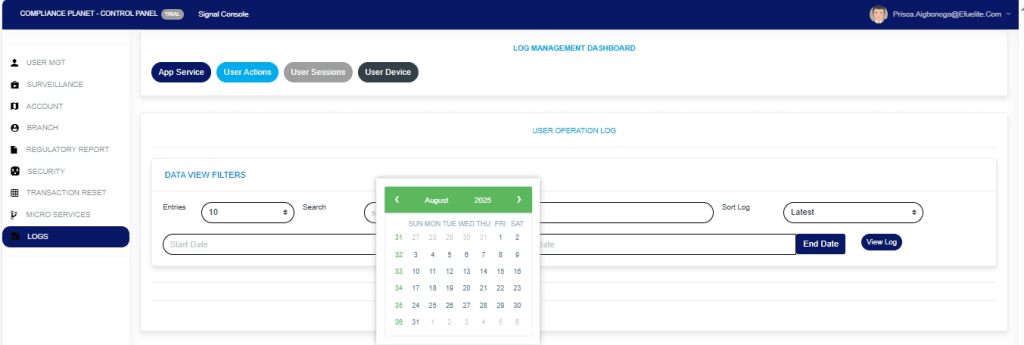
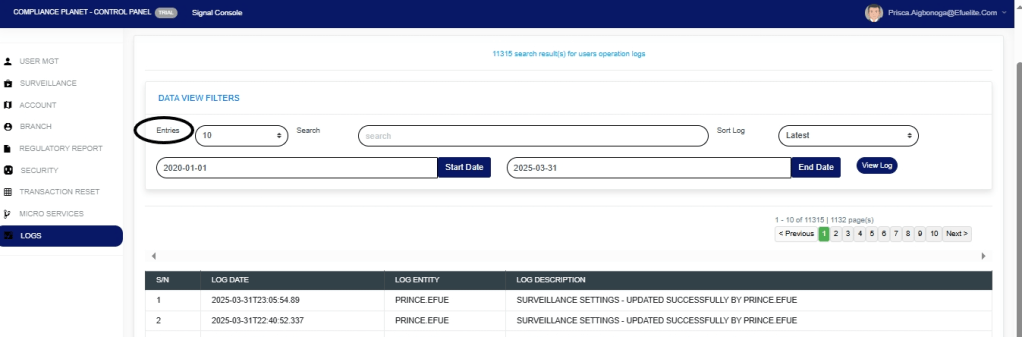
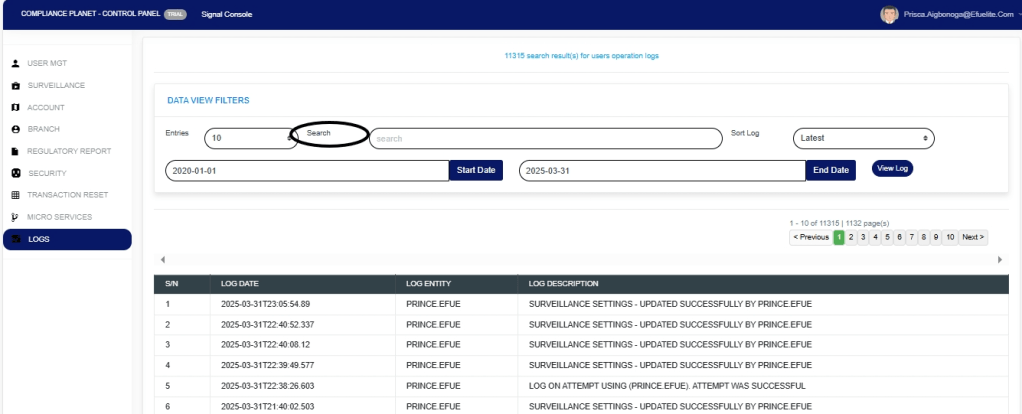
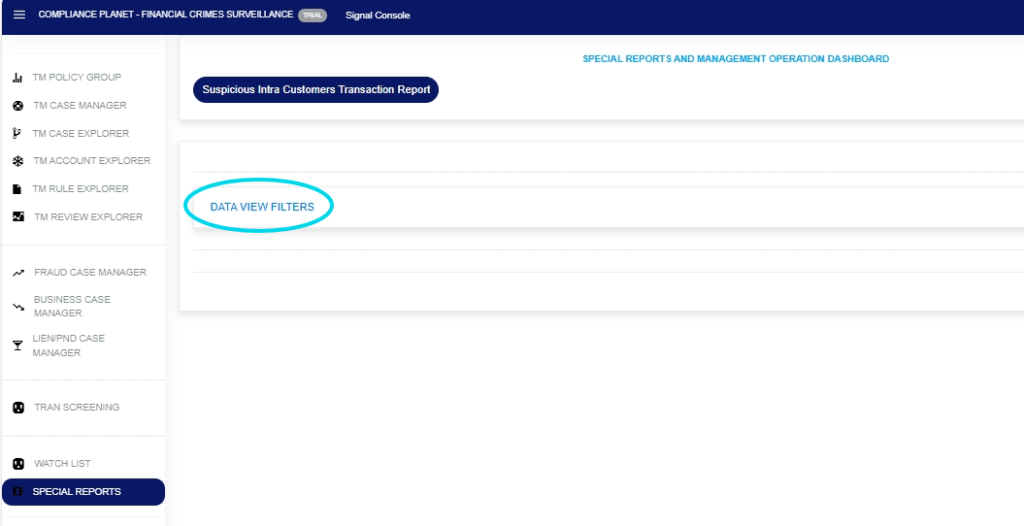
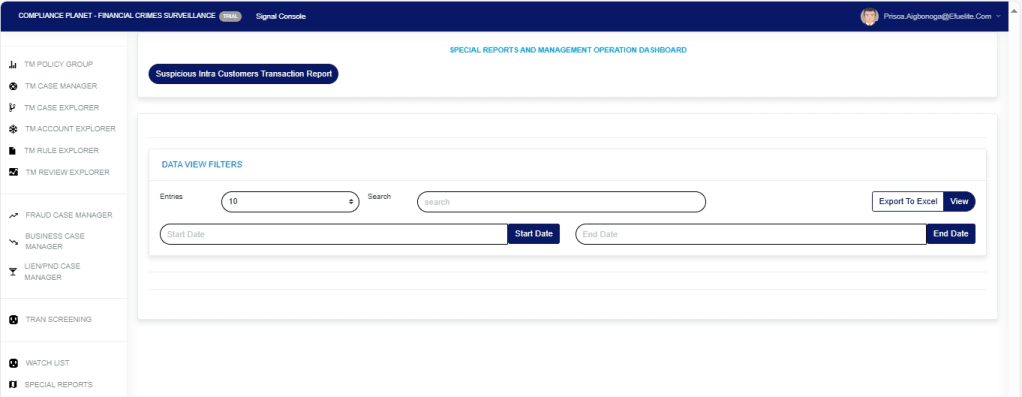
Question 8:Meaning of *Entry* in the data view filter.

Insight:
Entry refers to the number of records displayed on the screen. So, if the total records are 1000 and your entry is 100, the first page will display 100 records, and when you export, only 100 will be exported. You can then switch to page 2 and export the next 100 records or increase the entry to display more or all of your records on the first page. Be guided to display only what your system resources can handle on the first page. We strongly advise that, based on the user’s system capacity, do not exceed 10,000. We understand that there are times when certain rules are not monitored daily, and that a bulk investigation is needed. In such situations, please batch your dates and entries depending on the number of cases that emanate daily from a rule

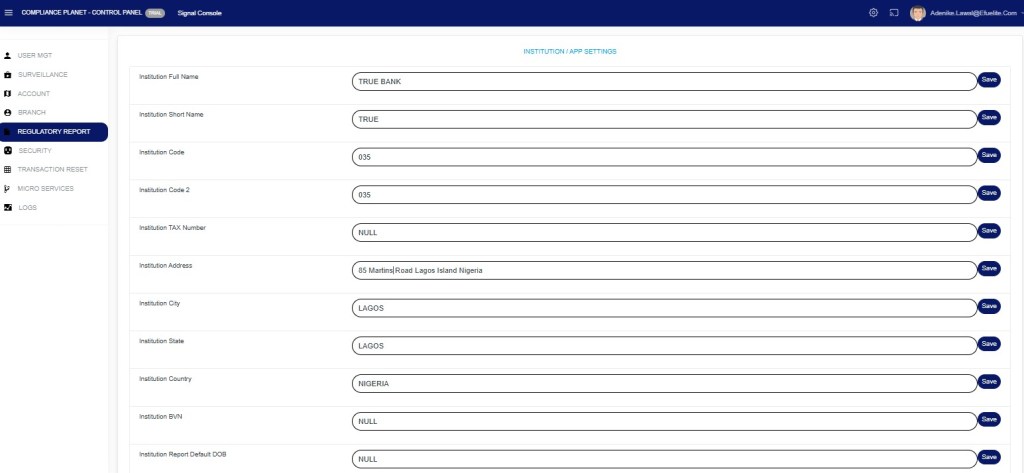
For general speed improvements, please liaise internally with Compliance and IT Management to provision AML Databases in the cloud or on standalone servers with sufficient resources to handle significantly higher request volumes.

Currently, the resources in use are those provided in 2017 for reporting purposes, a time when the Bank’s customer base and transaction load were approximately one-third of what it is now.
Despite the huge surveillance system installed with AI embedded, no additional resources have been provided yet.

Compliance Planet, as of today, operates in an insufficient environment for its level of operations. The current level of scalability is enabled by its unique architecture and streamlined operations, which allow it to operate in an environment with very limited resources.

For further inquiries: 
Tel: +234(0) 816 555 9818
Email: solutions@efuelite.com 
Web: https://solutions.efuelite.com

How To Perform Global Real Time Sanction/PEP Screening In Compliance Planet Anti Money Laundering/Core Banking Finance Software.

The Compliance Planet Anti-Money Laundering (AML) and Core Banking Finance Software provides a seamless solution that integrates Global Real-Time Sanction Screening and PEP Monitoring within its operations. Through Global Screening Operations, users can instantly access worldwide watchlists, regulatory databases, and updated sanctions lists to ensure continuous compliance with international standards.

This guide provides a step-by-step overview of how to perform and utilize global real-time sanction screening/PEP screening within Compliance Planet, ensuring organizations remain proactive, compliant, and protected against financial crime risks.

STEP 1: From the app dashboard, click “SANCTION SCREENING” as seen in Fig.8a. below.

Fig.8a.

STEP 2: From the top-left menu, click “GRTS INSTANT,” as shown in Fig.8b below.

Fig.8b.

STEP 3: This will display the “GLOBAL REALTIME SANCTION/PEP SCREENINGpage as seen in Fig.8c. below

Fig.8c.

STEP 4: Fill in the fields on theWATCHLIST, BLACKLIST, SANCTION SCREENING OPERATION DASHBOARDpage as seen in Fig.8d. below

SEARCH: The person’s name

SCHEMA: The customer category, for which there is a dropdown for selection.

COUNTRY: The country of the customer, selected from a dropdown list.

LIMIT: The number of search results you want to get. This is a dropdown to select from.

SCORE: How closely related you want your search result to match the customer you are searching for. This is a dropdown to select from.

SEARCH THE GLOBE: Click on the “Search the globe” button to spool results.

NOTE: If you are unsure of the customer’s “schema” and “country”, please leave these options as “none”.

Fig.8d.

PEP: The search result confirms that the customer is a politically exposed person.

WARRANT AND CRIMINAL ENTITIES: The search result confirms that the customer has been identified under the warrant and criminal entity list.

REGULATORY WATCHLIST: The search result confirms that the customer has been identified under the regulatory watch list.

SANCTIONS: These are the sanction list tied to the customer’s name, as seen in Fig.8e below

Fig.8e.

SOURCES: These are the sources from which all the information about the customers is gathered, as shown in Fig. 8f. below

Fig.8f.

ALIASES/AKA/PSEUDO-NAMES: These are the other names and Aliases the customer is also known by, as shown in Fig. 8g. below

Fig.8g

  • Click on the “Print Result” on the top right of the page to print results as shown in Fig.8h below.

Fig.8h

The following page will display Print information where you preview your search result, as shown in Fig.8i

Fig.8i

Click on the “save” button to save the result.

MANUAL INSTANT SCREENING

This refers to the process where individuals or customers are evaluated manually, often in real-time. During the manual instant screening process, the app will review data, assess data, documents, or transactions belonging to the customer in order to identify potential compliance risk or issues, as this includes:

  1. Politically Exposed Persons (PEP)
  2. Customers on the sanctioned list
  3. Customers in warrant and criminal entities
  4. customers in the regulatory watchlist

AUTOMATIC SCREENING OF NEW CUSTOMERS DURING ONBOARDING PROCESS

The app helps to streamline and automate the customer onboarding process. This makes it faster and more efficient. As accounts are being opened for new customers, the compliance planet software automatically screens the customer’s account name, signatory, and directors to ensure that they are not implicated or indicted on the sanctions list. The App also does the following;

  1. It gives notifications if customers are indicted.
  2. It provides notifications with a high degree of accuracy if customers are politically exposed persons (PEPs).

AUTOMATIC ROUTINE SCREENING OF EXISTING CUSTOMERS.

The app regularly reviews and assesses customers’ data, transactions, and behavior to identify potential risks, detect suspicious activity, or related compliance issues, which helps ensure regulatory adherence. Customers at onboarding may not be sanctioned; they may be sanctioned a year later. This is why the app must screen the database periodically to inform compliance personnel if a customer is on the sanctioned list or is a global PEP.

  1. The App screens the customers’ database from time to time to let the compliance personnel know if the customer is found with high accuracy as a close match to individuals, corporate firms, or entities on the sanctions list or as a global PEP.

For further enquiries: 
Tel: +234(0) 816 555 9818
Email: solutions@efuelite.com 
Web: http://solutions.efuelite.com

How to Carry out User Session Log Operations In Compliance Planet Anti Money Laundering/Core Banking Finance Software

The User Session Log page shows a record of active and inactive users’ sessions. A new session starts when a user logs into the software on a new browser or device and ends when the user logs out.

 STEP 1: From the dashboard, click “Control Panel” as in Fig. 28 .5a below.

Fig. 28.5a

  • This will display a page, then click “Logs” as in Fig. 28 .5b below


STEP 2: From the top menu, click “User Session” as in Fig. 28.5c below.

Fig.28.5c

STEP 3: This displays the Service User Session log page. Click “Dataview filter” as shown in the Fig.28.5d below.

Fig.28.5d

STEP 4: Fill in all the parameters as circled and explained in Fig.28.5e below:

Click on the ‘Start Date’ button to specify the start date; this also displays a calendar below the date box.

Click the ‘End Date’ button to specify the end date; this will also display a calendar below the date box.

Click on the ‘Entries’ in the entries box to change the number of entries you want to see per page.

 Click on the ‘Search’. You can search for a service by typing the search term in the Search box. The software displays the results in real time.

Click the “Session Type” box to change the view to either active or inactive sessions

Note that the software displays active user sessions by default when you navigate to the user session log.

Fig.28.5e

Click on ‘View Log’ as in Fig.28.5e above to view the services.

This will display a page, as shown in Fig. 28.5f below, which lists user sessions that are currently Active within the specified date range. The page also provides additional information, such as the user’s device, session status, session start date, and end date.

Fig.28.5f

STEP 5: Click the “End Session” button attached to a user’s record, as in Fig.28.5g below, to end that session.

Fig.28.5g

This displays a confirmation console, as shown in Fig.28.5h below.

STEP 6: Click the “Confirm” to proceed or “Cancel” to close the console.

Fig.28.5h

  • A notification will be displayed at the top of the page in green colour as in Fig.28.5i below, showing that the session has been successfully ended and the user is successfully logged out.
    • Fig.28.5i

STEP 7: Click the checkbox at the top or bottom of the table, as in Fig.28.5j below, to select all the records displayed in the table.

Fig.28.5j

STEP 8: Click the “End Selected Sessions” as in Fig.28.5k below to end the session.

Fig.28.5k

  • This will display a confirmation console as in Fig.28.5l below

STEP 9: Click “Confirm” to proceed or “Cancel” to close the console.

Fig.28.5l

  • A notification will be displayed at the top of the page to indicate that the sessions have been successfully ended and the users are logged out.

For further enquiries : 
Tel +234(0) 816 555 9818
Email solutions@efuelite.com 
Web https://solutions.efuelite.com

How to Carry out User Device Log Operations In Compliance Planet Anti Money Laundering/Core Banking Finance Software

The User Device Log page displays a record of user devices currently logged in to the Compliance Planet AML software.

STEP 1: From the dashboard, click “Control Panel” as in Fig.28.6a below

Fig.28.6a

This will display a Log Management Operations dashboard as in Fig.28.6b below

    STEP 2: From the top menu, click “User Device” as in Fig.28.6b below

    Fig.28.6b

    STEP 3: This will display the Click “Dataview filter” as shown in the Fig.28.6c below.

    Fig.28.6c

      STEP 4: This will display the “Parameters” as shown in Fig.28.6d below.

      Fig.28.6d 

      STEP 3: Click “Start Date” and “End Date” as in Fig.28.6e and Fig.28.6f below to select the end and start date for the records you want to view.

      Fig 28.6e

      Fig.28.6f

      STEP 4: Click “View Log” (Fig. 28.6g below) to view the User Device log for the selected date range.

      Fig 28.6g

      STEP 5: This will display a page showing the records of users’ devices that are currently logged in to the software. The page also provides information such as the device IP Address, Browser, Operating system, and date the device was used to log into the software, as in Fig. 28.6h below

      Fig 28.6h

        STEP 5: Click the “Entries” box as in Fig.28.6i below to select the number of records you want to see per page.

        Fig.28.6i

        STEP 6: Click the “Search” textbox as in Fig.28.6j below to search records by inputting either the user email, device name, browser name, or OS (Operating System). Note that the software displays the search results in real time as you input each character of the search term.

        Fig.28.6j

        This image has an empty alt attribute; its file name is 28.6i.jpg

        For further enquiries : 
        Tel +234(0) 816 555 9818
        Email solutions@efuelite.com 
        Web https://solutions.efuelite.com

        How to Edit Institution Data Settings On Control Panel In Compliance Planet Anti Money Laundering/Core Banking Finance Software

        In this section, you can edit the bio-data of the institution. This includes: the full and short name of the institution, the institution code, tax number, Bvn, address, year of establishment, default email, and default occupation. This section provides a guide on how to perform operations regarding institution settings on the Compliance Planet, with step-by-step instructions and pictures.

        NOTE: Only the Supreme Administrator can carry out these operations.    


        STEP 1: From the app dashboard, click “CONTROL PANEL” as in Fig 27.3a below.

        Fig 27.3a

        STEP 2: From the left-hand side menu, click “REGULATORY REPORT”. as in Fig 27.3b below

        Fig 27.3b

        STEP 3: From the menu, click “Institution” as in Fig 27.3c below

        Fig 27.3c

        • This displays a drop-down as in fig 27.3d below

        STEP 4: Click “Settings” on the institution drop-down as in fig 27.3d below

        Fig 27.3d                                  

        • This displays a console as in Fig. 27.3e below

         Fig. 27.3e

        STEP 3:          Click on any of the textboxes to edit it. See an example in fig. 27.3f below.

        Fig. 27.3f

        STEP 4: Click on the “SAVE” button at the right end of the row to update that specific field. See an illustration in fig. 27.3g below.

        Fig. 27.3g

        • A notification as in fig. 27.3h below will be displayed at the top of the page when the operation is complete.

        Fig. 27.3h

        For further enquiries: 
        Tel: +234(0) 816 555 9818
        Email: solutions@efuelite.com 
        Web: https://solutions.efuelite.com

        How to Carry Out App Service Log Operations In Compliance Planet Anti Money Laundering/Core Banking Finance Software

        The service log keeps a record of the Compliance Planet software services, forming a logical path linking a sequence of operations on the software. The service log provides a list of services that have affected an operation in a sequential order. It is used to trace the services that have affected the contents of a record.

        STEP 1: From the dashboard, click “Control Panel” as in Fig. 28 .3a below

        Fig .28.3a

        • This will display a page, then click “Log” as in Fig. 28 .3 b below
          • Fig. 28 .3 b

        STEP 2: Click “App Service” as in F.ig 28.3c below

        F.ig 28.3c

        This will display the service App Service log page. Click “Dataview filter” as shown in Fig.28.3c below.

        Fig.28.3c

        STEP 4: Fill in all the parameters as circled and explained in Fig.28.3d below:

        Click on the ‘Start Date’ button to specify the start date; this also displays a calendar below the date box.

        Click on the ‘End Date’ button to specify the end date; this also displays a calendar below the date box.

        Click on the ‘Entries’ in the entries box to change the number of entries you want to see per page.

         Click on the Search’. You can search for a service by typing the search term in the Search box. The software displays the results in real time.

        Click on the Sort Log’. You can sort the records from the latest to the earliest or vice versa. Specify the order of the list by clicking on the Sort Log box

        Click on ‘View Log’ as in Fig.28.3d below to view the services.

        Fig.28.3d

        STEP 5: This displays a list of services related to operations carried out within the specified period. See Fig.28.3e for an example.

        Fig.28.3e

        STEP 6: Click on the At the bottom-right corner of the page, the software provides information about the number of pages, with the page numbers written out. Clicking any page number takes you to that particular page. Click ‘NEXT’ to go to the next page and click on ‘PREVIOUS’ to go to the page before the current page. See these features in Fig.28.3f below.

        Fig.28.3f

        STEP 7: Each service log entry includes an action button for mailing the service log to the Compliance Support desk.

        Click on ‘Send To Support Desk’. This button is at the end of the row of each log entry. See this in Fig.28.3g below.

        Fig.28.3g

        STEP 8: This displays a confirmation console, as shown in Fig. 28.3h. Click on ‘Confirm’ to proceed.

        Fig.28.3h

        STEP 8: A notification will be displayed at the top of the screen, as in Fig.28.3i, when the mail is sent successfully, and the action button for that log will change to ‘Sent’.

        Fig.28.3i

        For further enquiries : 
        Tel +234(0) 816 555 9818
        Email solutions@efuelite.com 
        Web https://solutions.efuelite.com

        How to Carry Out Transaction Migration Operations(Transaction Reset) on Control Panel In Compliance Planet Anti Money Laundering/Core Banking Finance Software

        This section provides a guide on how to perform transaction operations pertaining to transaction reset in the control panel on the Compliance Planet, with step-by-step instructions and pictures.

        NOTE: Only the person(s) profiled as Administrator can carry out these operations

        This means moving transactions from the transaction pool to the archive. Transactions migrated to the archive will not be available for report processing.

        STEP 1: From the app dashboard, click on “CONTROL PANEL” as shown in the image below.

        • Click on “CONTROL PANEL” and this displays a page shown below in Fig.2.1a
          • Fig.2.1a

        STEP 2: Click on“TRANSACTION RESET” as shown in Fig. 2.1b below

        Fig. 2.1b

        • This will display a “Report Transaction Reset” page shown below, as seen in Fig.2.1c

        Fig.2.1c

        • Click on the “Start” and “End” dates to specify the dates. This will display a calendar as shown in Fig.2.1d

        Fig.2.1d

        Take a look at the arrows labelled a to d in Fig.2.1e to study the calendar.

        • Click on the given year to change it to your year of choice
        • Click on the given month to change it to your month of choice
        • Then click on the date of the month
        • You can also click on the angle brackets on the calendar [ ‘<’ or ‘>’ ] to go backward or forward.

        Fig.2.1e

        • To reset the transaction type, specify the transaction type or select all.
        • Tick the checkbox ◻ of the transaction type(s) to be reset. You can tick as many transaction types as you want. Fig.2.1f

        Fig.2.1f

        • STEP 3: Tuggle on the “Reset” button as shown in Fig.2.1g

        Fig.2.1g

        • Click on “Migrate Transaction” as shown in Fig.2.1h

        Fig.2.1h

        • A confirmation console will be displayed. Click “confirm” to proceed or cancel to dismiss the console, as shown in Fig.2.1i

        Fig.2.1i

        • A planet signal console will be displayed after you click on confirm from the confirmation console, as seen in Fig.2.1j

        Fig.2.1j

        • Go to “Micro services” on the Control Panel, as shown in Fig.2.1k

        Fig.2.1h

        • Click on the “Schedule” as shown in Fig.2.1l

        Fig.2.1l

        • Select the ‘transaction type‘ and the ‘process time‘ as shown in Fig.2.1m

        Fig.2.1m

        • Click on History from the Micro services page as shown in Fig 2.1n

        2.1n

        • This will display a page below, as shown in Fig.2.2a

        Fig.2.2a

        • Click on the “Entries” box to enter the number of pages you want to view per page, as shown in Fig.2.2b

        Fig.2.2b

        • Click on the “Transaction type box” to enter the type of transaction you wish to view its history, as shown in Fig.2.2c

        Fig.2.2c

        • Click on the “sort history box” to select how you want to view the history, either from the earliest or the latest, as shown in Fig.2.2d

        Fig.2.2d

        • Enter the “Start date” and “End date” of the transaction you want to view its history, as shown in Fig.2.2e
        • Click on “View” as shown in Fig.2.2e
        • This will display a page as shown in Fig.2.2f below

        Fig.2.2f

        For further enquiries : 
        Tel +234(0) 816 555 9818
        Email solutions@efuelite.com 
        Web https://solutions.efuelite.com

        How to View User Action Log In Compliance Planet Anti Money Laundering/Core Banking Finance Software

        The User Action log provides a list of activities or actions that were carried out successfully and completed on the Compliance Planet software in a chronological order at any time. Here is how to view a user log for any period.

        STEP 1: From the dashboard, click “Control Panel” as in Fig.28.4a below.

        Fig.28.4a

        This will display a “Log Management Operations dashboard as in Fig.28.4b below

        STEP 2: This will display a page, then click “Logs” as in Fig. 28 .4b below

        Fig. 28 .4b

        STEP 3: From the top menu, click “User Action” as in Fig.28.4c below.

        Fig.28.4c

        STEP 4: This displays the Service User Action log page. Click “Dataview filter” as shown in Fig.28.4d below.

        Fig.28.4d

        STEP 5: Click on the ‘Start Date’ button to specify the start date. This will display a calendar below the date. See Fig.28.4e for an example.

        Fig.28.4e

        STEP 6: Click on the ‘End Date’ button to specify the end date. This displays a calendar below the date box. See Fig.28.4f for an example.

        Fig.28.4f

        STEP 7: Click on ‘View Log’ as in Fig.28.4g to view the services.

        Fig.28.4g

        STEP 8:This displays a list of activities that were carried out within the specified date range. See Fig.28.4h for an example.

        Fig.28.4h

        STEP 9:Click on the ‘entries’ box to change the number of entries you want to see per page. See Fig.28.4i

        Fig.28.4i

        STEP 10:Search for an activity by inputting a search term in the ‘Search’ box. See Fig.28.4j for an example of a search.

        Fig.28.4j

        STEP 11:You can sort the records from the latest to the earliest or vice-versa by clicking on the ‘Sort Log’ box and selecting your preferred order as in Fig.28.4k below.

        Fig.28.4k

        STEP 12:At the bottom-right corner of the page, the software provides information about the number of pages, with the page numbers written out. Clicking on a page number to go to that page. Click on ‘NEXT’ to go to the next page and click on ‘PREVIOUS’ to go to the page before the current page. See these features in Fig.28.4l below.

        Fig.28.4l

        For further enquiries : 
        Tel +234(0) 816 555 9818
        Email solutions@efuelite.com 
        Web https://solutions.efuelite.com

        How to Carry Out Special Report On Operations On Digital Financial Crimes Surveillance In Compliance Planet Anti Money Laundering/Core Banking Finance Software

        This section provides a guide on how to carry out Special Report operations on the Compliance Planet Anti Money Laundering/Core Banking Finance Software, with step-by-step instructions and pictures.

        STEP 1: From the app dashboard, click “DIGITAL FINANCIAL CRIMES SURVEILLANCE” as in Fig.6a below.

        Fig.6a

        STEP 2: From the left-hand side menu, click “Special Report” as in Fig.6b below.

        Fig.6b

        STEP 3: Click on the “Suspicious Intra Customer Transaction Report” as in Fig.6c below.

        Fig.6c

        STEP 4: Click on “Data View Filters” as in Fig.6d below.

        Fig.6d

        STEP 5: And this opens the Data View Filters page as in Fig.6e below.

        Fig.6e

        STEP 6: Fill all the parameters in the Data View Filters page as in Fig.6f below

        Click on the ‘Start Date’ button to specify the start date; this also displays a calendar below the date box.

        Click the ‘End Date’ button to specify the end date; this will also display a calendar below the date box.

        Click on the ‘Entries’ in the entries box to change the number of entries you want to see per page.

         Click on the ‘Search’. You can search for a service by typing the customer name in the Search box. The software displays the results in real time.

        Click the “View” box to view results

        Fig.6f

        STEP 7: Click on the “Export To Excel” to download the report as in Fig.6g below.

        Fig.6g

        STEP 8: Click on the “Confirm” button to confirm your download as in Fig.6h below.

        Fig.6h

        For further enquiries: 
        Tel: +234(0) 816 555 9818
        Email: solutions@efuelite.com 
        Web: http://solutions.efuelite.com

        How To View / Edit CCO Report data on Control Panel In Compliance Planet Anti Money Laundering/Core Banking Finance Software

        NOTE: This action can only be carried out by person(s) profiled as Administrator in the software

        From the app dashboard, click on “CONTROL PANEL” as shown below.

        • This will display a drop-down as in the image below. The dropdown lists the various activities under the control panel available on the Compliance Planet software.

        Click “REGULATORY REPORT” from the drop-down menu to open the CCO/REPORT CONFIGURATION DASHBOARD page. See the image below as shown in Fig.3.1a

        Fig.3.1a

        Click on “CCO”, which then displays a drop-down as seen below in Fig.3.1b

        Fig.3.1b

        • STEP 1:  From the drop-down, click “View,” which then displays the image below in Fig.3.1c
        • Note that the Report Person Data View page contains all the necessary information to file a regulatory report.

        Fig.3.1c

        How to Edit the CCO Report Data

        • STEP 1: Click on CCO” to see the drop-down below as shown in Fig.3.1d

        Fig.3.1d

        STEP 2: Click on the Edit” button from the list of drop-downs as shown in Fig.3.1e

        Fig.3.1e

        • This will display the image below as seen in Fig.3.1f
        • Note that the report person data” page contains all the necessary information required to file a regulatory report, and each box must be filled out.

        Fig.3.1f

        STEP 3: Click on the save changes” button at the bottom of the page, and this will display a page as shown in Fig.3.1g

        Fig.3.1g

        Click “Confirm” to proceed or “Cancel” to dismiss the console as shown in Fig.3.1h

        Fig.3.1h

        For further enquiries : 
        Tel +234(0) 816 555 9818
        Email solutions@efuelite.com 
        Web https://solutions.efuelite.com